Packs, Pounds & Percentages
Understanding and preparing for heavy pack loads in the backcountry.
We have seen it all when it comes to the gear junkie's obsession with ultralight: the $50 titanium spork, the toothbrush snapped in half, the same pair of socks worn nine days straight, all to save 60 grams. Most of us will spend hundreds of dollars to shave off a few ounces.
There is nothing wrong with dialing in your gear. But when your objective demands a heavy pack, with ropes, glacier gear, extra food, and group supplies, no amount of retail therapy will prepare your body to carry it across rugged terrain.
Ounces Lead to Pounds, Pounds Lead to Pain
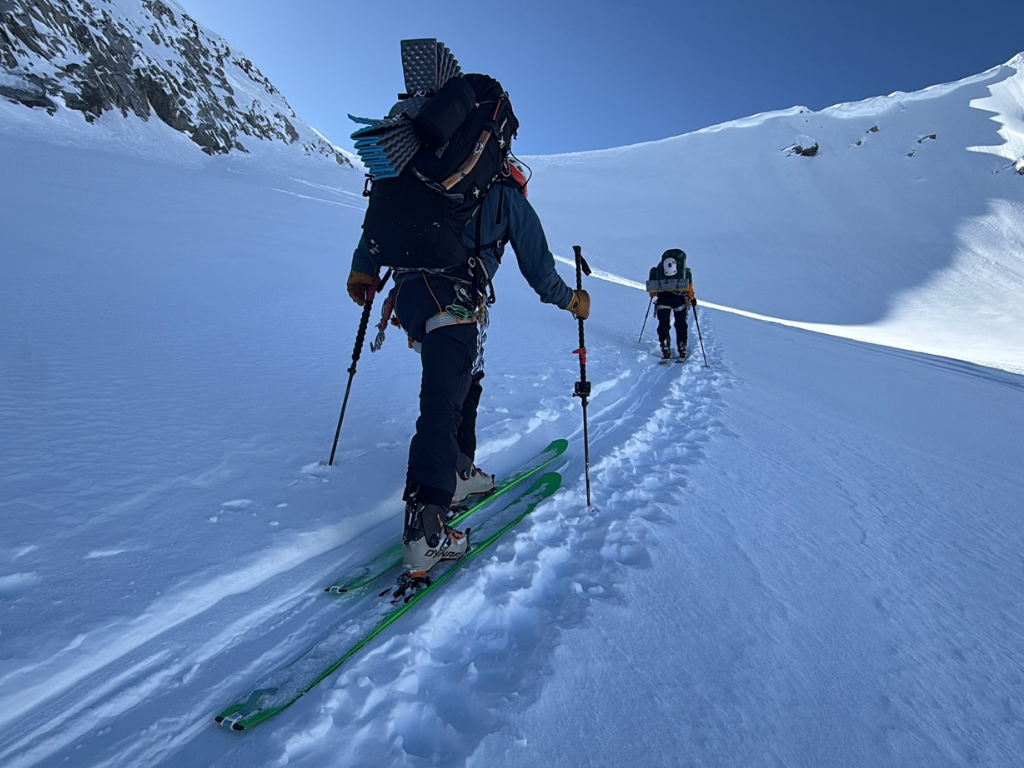
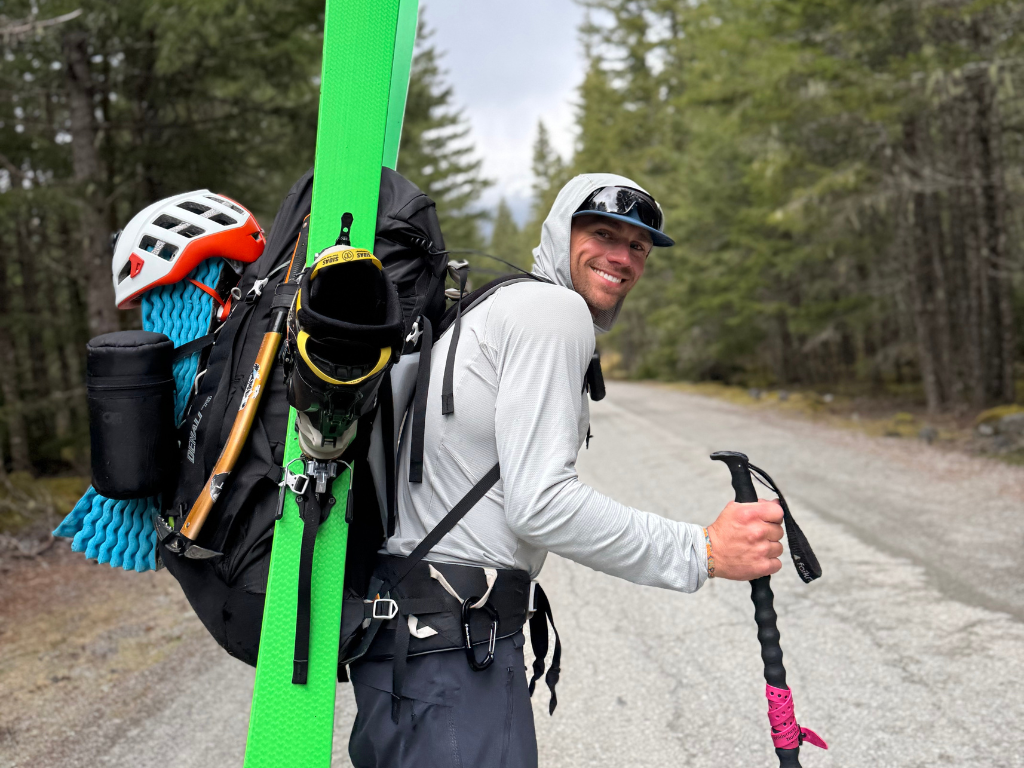
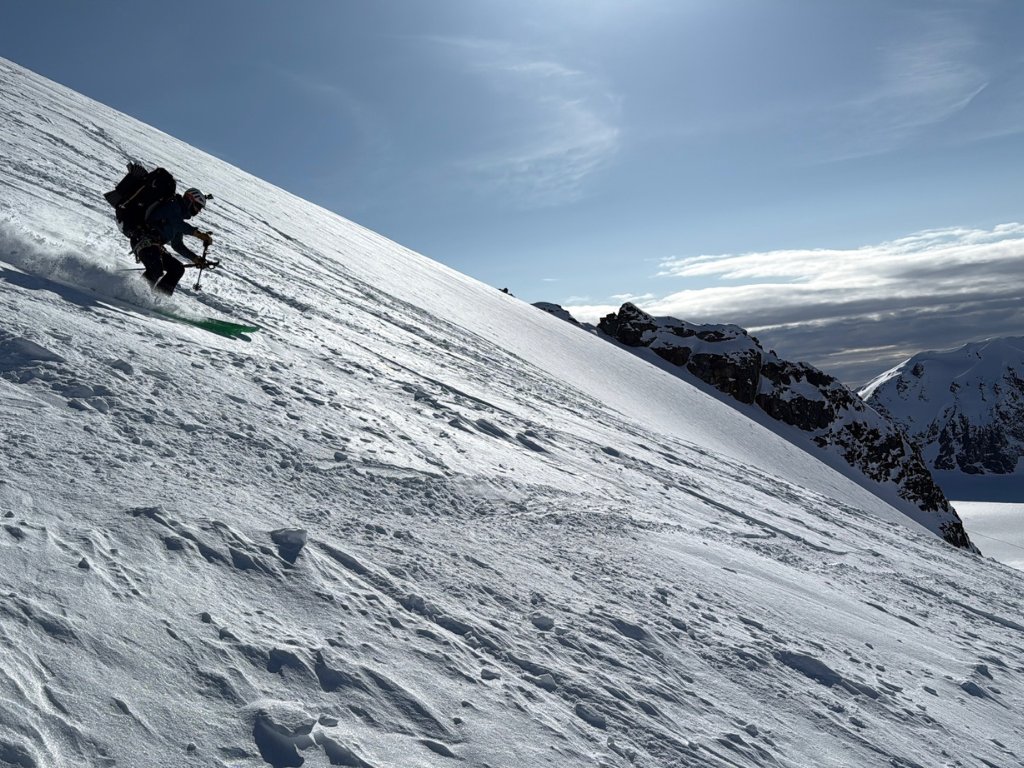
On back-to-back traverses through British Columbia's Coast Range, I got a firsthand reminder. I slogged my 60-pound companion across dozens of glaciers, over steep passes, and down long technical descents. Even after a decade of sport-specific training and guiding, I felt it: tight hips, tender shoulders, and the kind of fatigue that lingers for days.
Deep in the pain cave, I was not thinking about shaving ounces. I was thinking about the one variable I could control, how I prepared.
This guide is not about gear hacks or the best ultralight sleep system. It is about training your body to handle the weight you cannot avoid, using science-backed programming, smart progressions, and a clearer picture of what your body is managing out there. We will break down the numbers, unpack the risk factors, and show you how to train for your next objective, whether that is a multi-day trek, a glacier expedition, or your heaviest trip yet.
One: Know Your Number
The question we hear most from mountaineers and backpackers is "How much should my pack weigh?" On its own, that question is a bit like asking how much you should lift in the gym. It depends. What matters is how the load relates to your body, your fitness, and the terrain ahead of you.
The simple equation
Pack weight percentage
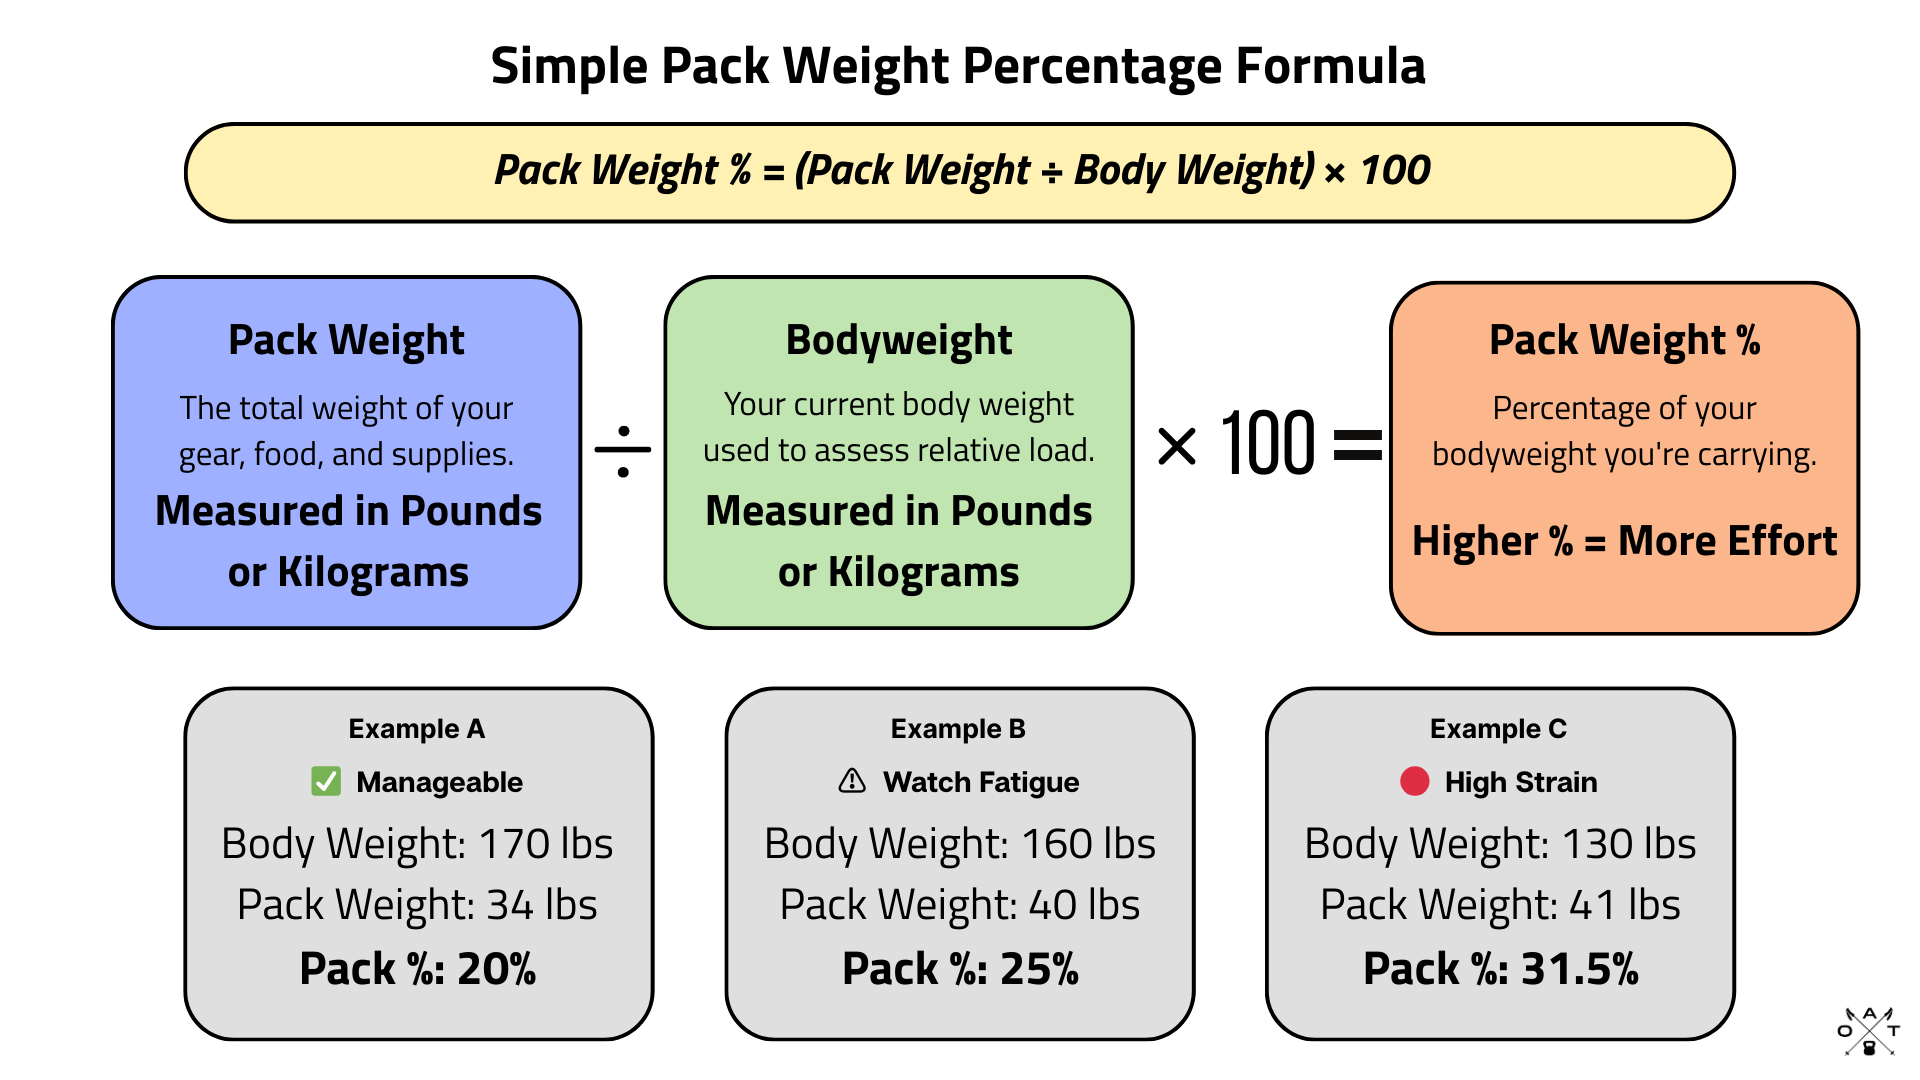
Pack Weight % = (Pack Weight ÷ Body Weight) × 100
One of the most useful tools we have for judging stress, strain, and fatigue risk in the mountains. It tells you how much load your body is managing, not just how much gear you packed.
How to use the chart
Find your bodyweight in the left column, then follow that row until you hit your estimated pack weight. The number in that cell is the percentage of your bodyweight you are carrying, which is a strong indicator of effort, fatigue risk, and training demand.

Why 35% is the critical threshold
Research and field experience both point the same direction. Once pack weight passes 35% of your bodyweight, fatigue and injury risk climb sharply, and even strong, well-trained athletes start to see it.
Above 35% bodyweight
What starts to break down
Stay under 35% when you can, especially on multi-day trips or technical terrain.
Two: A Field Case Study
On two Coast Range traverses, the Garibaldi Neve and the Spearhead, our team carried between 30% and 36% of bodyweight over 3-day routes with glacier skinning, bootpacking, and steep alpine terrain. Small differences in body size or pack weight changed the percentage a lot, and changed how hard that load hit each of us.

What the chart tells us
On the Spearhead, Emily cut her pack by just 7 pounds, and her load percentage dropped by nearly 6%. That moved her out of a high-strain zone and into a manageable one. Mikey's pack got slightly heavier, but his percentage barely moved, thanks to a larger frame and a high strength-to-weight ratio.
Three: Not All Packs Are Equal
Picture two hikers with the same bodyweight and the same 35-pound pack. One moves smoothly through the long climbs. The other is gassed before lunch. The pack is identical, so the difference comes down to how well each body is prepared to carry it.
Pack weight is a demand, and it interacts with your strength, training history, terrain, and fatigue. That is why some hikers bounce back from a 10-mile day while others are wrecked halfway through.
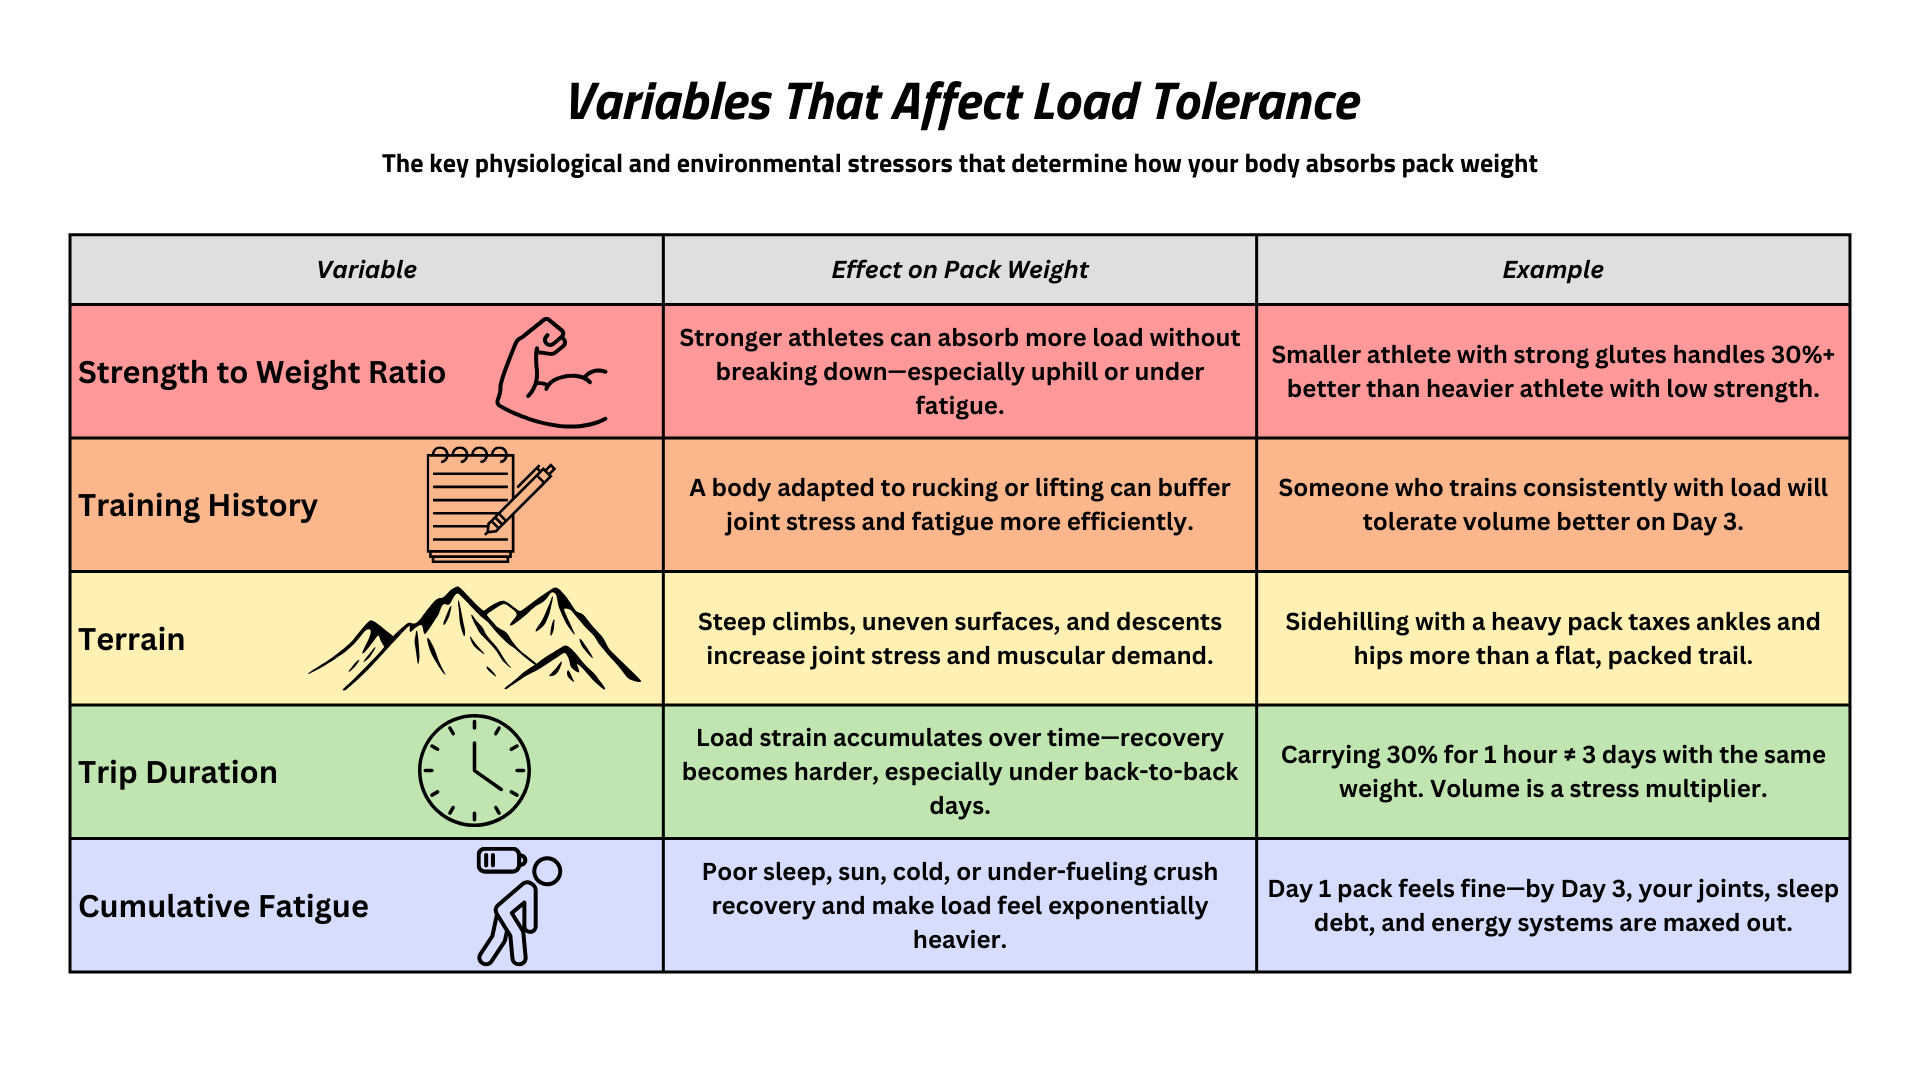
Variables that shape load tolerance
- Strength-to-weight ratio. A smaller athlete with strong glutes, hamstrings, and core can often handle more load than a larger athlete with less relative strength.
- Training history. If you have been lifting, rucking, or hiking with weight, your muscles, tendons, and connective tissue hold up better under strain.
- Terrain. Smooth trail costs little. Steep climbs, sidehilling, boulders, and technical descents multiply joint demand and energy output.
- Trip duration. Carrying 30% of your bodyweight for an hour is not the same as carrying it for three days. Volume compounds.
- Cumulative fatigue. Heat, sun, poor sleep, altitude, and under-fueling all shrink your tolerance. What feels fine on day one can wreck you by day three.
Effort climbs fast with pack percentage
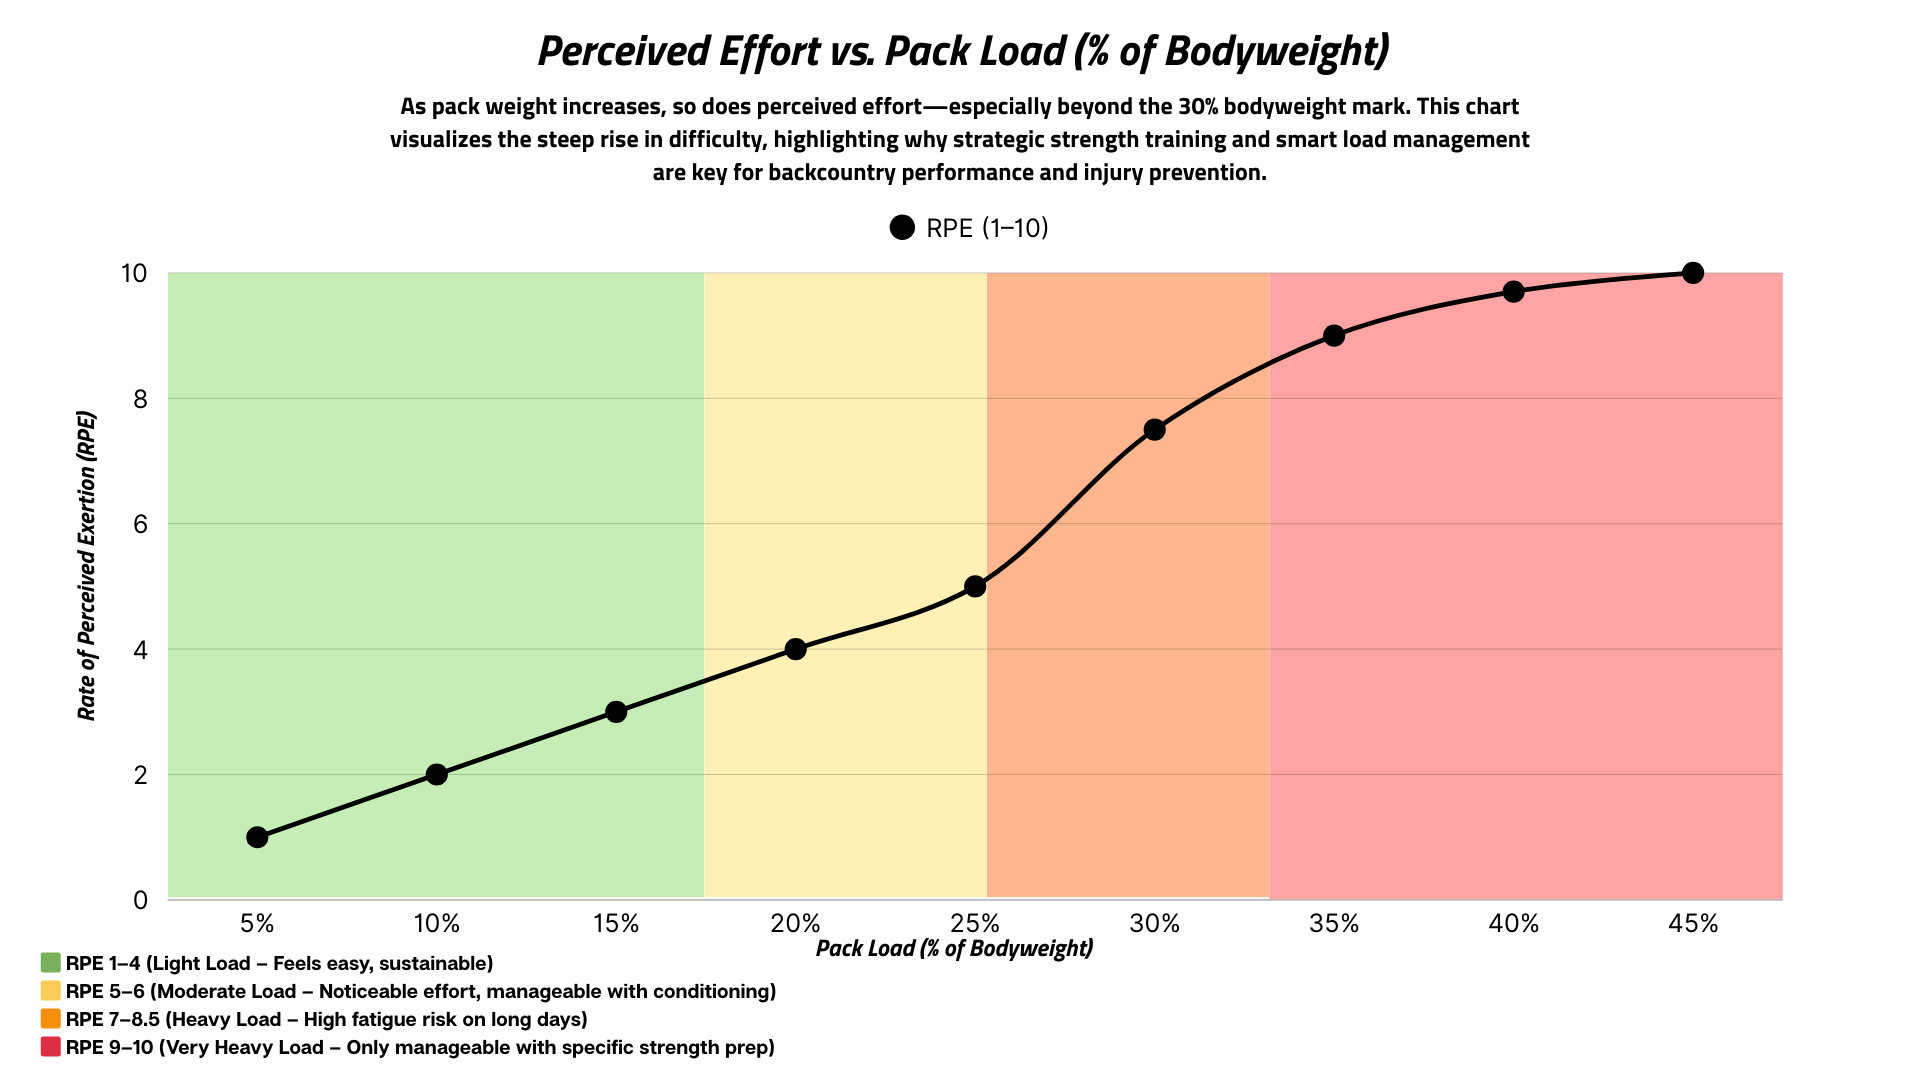
The heavier the load relative to your bodyweight, the steeper the physiological cost. We charted how Rate of Perceived Exertion (RPE) ramps up as pack percentage rises, and the curve bends hard once you cross 30 to 35%. In the red zone, the same mileage costs far more effort, fatigue, and recovery time.
Four: Safe or Sketchy?
There is no single safe number for pack weight. But after years of guiding, coaching, and thousands of miles under load, one thing is clear. Your body has limits, and certain thresholds reliably push people past them.
These are not hard rules. They are a way to notice when you are in the green and when you are drifting toward red, and to shift the question from "How much should my pack weigh?" to "How much can my body sustainably carry, given my training, the terrain, and the conditions?"

What pushes you toward the red zone
Even well-trained hikers struggle when conditions stack against them. These five factors most often turn a manageable load into a risky one.
- Terrain difficulty. A 30% pack may feel fine on smooth trail. On loose scree, snow, or off-camber descents, the same load feels brutal and gets risky.
- Elevation gain. Long, sustained climbs load your posterior chain, lungs, and joint stability hard.
- Trip duration. Carrying 30% for a few miles is very different from carrying it for three days straight.
- Pace. Fastpacking or racing with weight drives up ground reaction forces and impact stress. Joints and tendons pay for it.
- Recovery and environment. Cold, altitude, poor sleep, dehydration, and low calories all lower your resilience and shrink your tolerance.

Five: Are You Ready for Your Pack?
Your joints, muscles, and nervous system manage that load with every step. So before you head out, the better question is not how much your pack weighs. It is whether your body is trained to carry it.
Self-assessment
Three readiness tests
Each yes raises your odds of moving efficiently, staying healthy, and enjoying the trip instead of just surviving it.
Not sure where you land?
Walk through the Pack Readiness Flowchart. It is a simple way to see where you stand today and what your next training focus should be, based on your goals, pack weight, and current capacity.

Six: Train to Avoid Pain
If you want to move well under a heavy pack, the best investment you can make is a smart, progressive strength program. It is one of the most effective ways to reduce injury risk, build muscular endurance, and develop the durability that high-mileage loaded days require. You cannot hike your way into this shape. You build it from the ground up with stability, strength, and time under tension.
Strength training
Before you ever shoulder a pack, your body needs a stable foundation of neuromuscular control, joint alignment, and integrated core strength. With that in place, progressive loading teaches your system to absorb and manage force safely.
Time under tension, meaning how long a muscle is working per rep, builds more than muscle. It builds resilient connective tissue, the tendons, ligaments, and fascia that protect your joints and hold your form together when fatigue sets in.
Foundational exercises we program
- Front squats and deadlifts. Total-body strength and structural tolerance to load.
- Weighted step-ups, ideally with your pack. The closest gym match to uphill hiking under load.
- RDLs, Bulgarian split squats, reverse step-ups. Glutes, hamstrings, and single-leg control for climbs and descents.
- Farmer carries and weighted planks. Core engagement and anti-rotation stability while moving.
- Dead bugs. Deep core coordination that keeps you from collapsing and compensating late in the day.
Training notes
Tempo and rep ranges
Max strength work is powerful and risky when done wrong. If you are pushing near your limit, get a coach.
Rucking
Rucking is one of the most practical, sport-specific tools for training load carriage. It will not replace strength training, and it is not the same as hiking, but it bridges the gap between gym strength and the mountains.
It gets your body used to carrying load exactly the way you will in the field. Your hips will get sore, your shoulders will ache, and your posture will get tested. That is the point. Packs shift, dig in, and pull your center of gravity around. Unless you are using a tumpline like a Himalayan porter, your setup will never be perfect, and rucking teaches your body to tolerate that before it counts.
- Sport-specific. Same gear, carried the same way, in similar conditions.
- Builds tissue tolerance. Skin, muscle, and joints adapt to friction, compression, and strain.
- Trains upright under fatigue. Sharpens the systems that hold your posture late in the day.
- Easy to scale. Use your pack or a weighted vest, on hills, a StairMaster, or an incline treadmill.

Why the progression works
Both programs raise pack load gradually over the training block instead of jumping straight to trip weight. That slow climb gives tendons, ligaments, and the small stabilizers around your ankles, knees, and hips time to adapt, which is where most overuse injuries start. Summit Strength tops out heavier because alpine objectives demand it, while Backpacker's Bootcamp builds to a load that matches multi-day trekking.
How to work it in
Rucking is a tool. Used well, it builds confidence and capacity under load. Piled on top of fatigue, it leads to overuse injuries. Start small, build gradually, and respect recovery.
- Add short rucks of 20 to 30 minutes on rest days as active recovery.
- Swap one steady-state cardio day per week for a longer ruck.
- Increase pack weight and duration gradually as your trip gets closer.
The L.E.A.D. Formula
Most advice about how much you can safely carry stops at a percentage rule. Percentages alone miss your readiness, your training, and your route. So we built the L.E.A.D. Formula, Load Estimation for Adventure Demands, a field-tested estimate grounded in coaching data, strength benchmarks, and time on rugged terrain.
Load Estimation for Adventure Demands
Recommended max pack weight
Body Weight × Strength Score × Terrain Modifier

How it works
- Body weight. The base for calculating relative load, in pounds or kilograms.
- Strength score, 0.2 to 0.4. A scaling factor for your load-carrying readiness. Use the benchmarks below.
- Terrain modifier, 0.8 to 1.1. 0.8 for rugged or technical routes, up to 1.1 for smooth trail.
Find your score
Strength score benchmarks
Example
You weigh 160 lbs, score 0.35 on strength, and your route is moderately rugged, so your modifier is 0.9.
160 × 0.35 × 0.9 = 50.4 lbs
Your upper limit for sustained travel, especially across multiple days under load.
The formula is not perfect. It is a practical starting point for thinking critically about your body, your gear, and what your objective asks of you.
Quick Reference
Know the load
- Pack weight divided by bodyweight, times 100.
- Aim to stay under 35%, especially on long or technical trips.
- Small weight cuts matter most for smaller athletes.
Read the conditions
- Rough terrain, big gain, and long days all shrink your margin.
- Moving fast under load multiplies impact stress.
- Poor sleep, cold, altitude, and low fuel lower your tolerance.
Build the capacity
- Test yourself: bodyweight lift, loaded step-ups, single-leg hold.
- Strength train with a 2-0-2 tempo across rep ranges.
- Add rucking gradually as the trip approaches.
Common Questions
How heavy should my backpack be?
It depends on your bodyweight, strength, and route. As a general guide, aim to keep your pack under 35% of your bodyweight, and use the L.E.A.D. Formula for a more personal estimate that accounts for your training and terrain.
How do I calculate my pack weight percentage?
Divide your pack weight by your bodyweight and multiply by 100. A 45-pound pack on a 150-pound hiker is 30%.
What happens when I carry more than 35%?
Fatigue and injury risk rise sharply. Expect more strain on ankles, knees, hips, and lower back, more gait compensation, and slower recovery, even if you are well trained.
Is rucking enough to prepare for a heavy trip?
No. Rucking is excellent sport-specific practice, but it works best on top of a progressive strength program. Strength builds the capacity, and rucking teaches your body to use it under a pack.
How can I tell if I am ready for a heavy pack?
Try three tests: deadlift or front squat close to your bodyweight, do 20+ controlled step-ups on an 18-inch box with a 30 to 40 pound pack, and hold a loaded single-leg position for 30 to 60 seconds. The more you pass, the better prepared you are.
Trip Debrief
The weight on your back is only part of the story. How your body carries it matters more. Pack percentage is a useful metric, but terrain, trip length, sleep, recovery, and above all your training decide how the day goes.
Train for the adventure you want to have, not the one your body is barely ready for. Intentional training builds strength before the strain, resilience before the redline, and confidence before you reach the trailhead.
See you in the mountains.
Build Strength for Adventure
Choose Your Program, Start Your 7-Day Free Trial
Pick the program that matches your next objective and try it free for 7 days. Every one is built to help you carry more, go further, and feel stronger doing it.
Choose your program below ↓


Trail Ready Challenge
11-day workout series to build strength and stability for the trail.
Learn More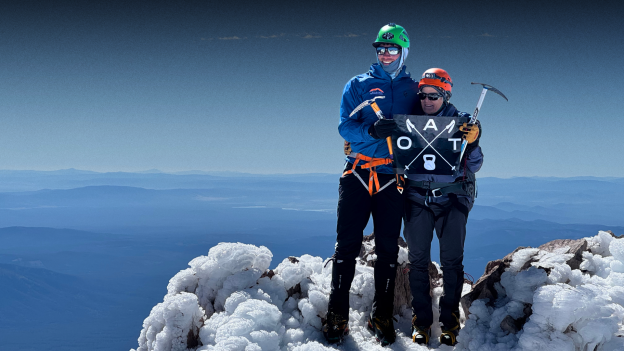
Mountain Ankles
On-demand mobility and stability training to build strong, injury-resistant feet and ankles for the trail.
Learn More
Nutrition Coaching
Performance nutrition for recovery, energy, and long-term outdoor longevity.
Learn More